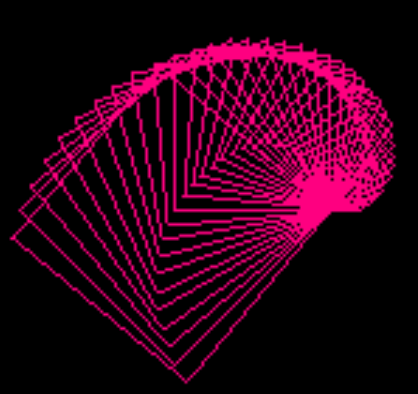
Go言語をスマホ上で勉強し始めて約2週間、いまだfmt.Printに頼っております。前回、画像ファイルに直線を引けるようになったので、今回はその上に懐かしい、最近あまり聞かない、タートルグラフィクス命令を「被せて」みます。タートルグラフィクスといえば再帰的(あるいは頭山的)なやつですな。描いてみました。
※「やっつけな日常」投稿順 indexはこちら
上でタートルグラフィクスを最近あまり聞かないなどと書いてしまった直ぐ後で、このごろもご活躍の件、思い出してしまいました。ビジュアル言語 Scratchでは、タートルならぬ猫さんが活躍されていたのでした。Scratch系のビジュアル言語には当方もmicro:bit関係の投稿などでお世話になっております。
Go上に実装のタートルグラフィクス
今回Go言語上に実装したタートルグラフィクスは以下のようなものです。
-
- 座標系は浮動小数指定、上がY軸+、右がX軸+の「普通な」2D平面
- 角度は「度」単位。反時計方向が+、時計方向が-。
- 原点は画像の中央、初期状態はX軸+向いている。
- 今のところ命令は4つ。Mov、Rot、Color、PenDown。Movで進み、Rotで方向を回転。適宜Colorを変えれば色変可能。またPenDownで描きながら進み、PenDownをfalse(PenUp)すれば描かずに進む。
現状描画の下回りは前回作成の ppm モジュール(今回バグ発見してまた改版しましたが)ですが、Line描画関数さえ、適合するシグネチャ型?のものであれば呼び出して使えるので切り替えも簡単。
Androidスマホ上のTerumux環境でnano使って編集しているところが以下に。
なお、配置場所は以下のパスとし、go.modを適宜配置してあります。
go/src/local/turtle
実際のソースコード全文が以下に。
package turtle

import "math"

type LineFunc func(x1 int, y1 int, x2 int, y2 int, r int, g int, b int) bool

type TurtleGraphics struct {
  xpos float64
  ypos float64
  direction float64
  ijSCALE float64
  iORG int
  jORG int
  ipos int
  jpos int
  iold int
  jold int
  colR int
  colG int
  colB int
  penDOWN bool
  line LineFunc
  verbose bool
}

func (t *TurtleGraphics) InitTurtleGraphics(x int, y int, sca float64, lf LineFunc) bool {
  t.xpos = 0.0
  t.ypos = 0.0
  t.direction = 0.0
  t.colR = 128
  t.colG = 128
  t.colB = 128
  t.penDOWN = true
  t.verbose = false
  t.line = lf
  t.ijSCALE = sca
  t.iORG = x
  t.jORG = y
  t.ipos = x
  t.jpos = y
  return true
}

func(t *TurtleGraphics) Mov(dist float64) bool {
  t.xpos += math.Cos(t.direction)*dist
  t.ypos += math.Sin(t.direction)*dist
  t.iold = t.ipos
  t.jold = t.jpos
  t.ipos = int(math.Round(t.xpos * t.ijSCALE)) + t.iORG
  t.jpos = t.jORG - int(math.Round(t.ypos * t.ijSCALE))
  if t.penDOWN {
    t.line(t.iold, t.jold, t.ipos, t.jpos, t.colR, t.colG, t.colB)
  }
  return true
}

func(t *TurtleGraphics) Rot(theta float64) bool {
  rad := theta * math.Pi / 180
  t.direction += rad
  if t.direction < (-math.Pi) {
    t.direction = 2.0*math.Pi + t.direction
  } else if t.direction > math.Pi {
    t.direction = t.direction - 2.0*math.Pi
  }
  return true
}

func(t* TurtleGraphics) Color(r int, g int, b int) {
  t.colR = r
  t.colG = g
  t.colB = b
}

func(t* TurtleGraphics) PenDown(x bool) {
  t.penDOWN = x
}
turtleモジュールを呼び出すmain側のソース
main側の実体は、再帰的なグラフィクスを描くための rotBox関数1個です。こいつで4角形を重ねて書いて、巻貝的(アンモナイト的?)な絵を描くと。main関数自体は、自作の2つのモジュール turtle と ppm を初期化し、rotBoxに最初のトリガをかけて、戻ってきたらばppmに出力するのみ。
なお、ppm モジュール内にバグがあったので訂正版が末尾にあります。
package main

import (
  "local/turtle"
  "local/ppm"
)

func rotBox(t *turtle.TurtleGraphics, siz float64, smax float64, th float64) {
  if siz > smax {
    return
  } else {
    t.Mov(siz)
    t.Rot(90)
    t.Mov(siz)
    t.Rot(90)
    t.Mov(siz)
    t.Rot(90)
    t.Mov(siz)
    t.Rot(90)
    t.Rot(th)
    rotBox(t, siz+0.25, smax, th)
  }
}

func main() {
  var img ppm.PpmImage
  XMAX:= 256
  YMAX:= 256
  img.InitPpmImage(XMAX, YMAX, 256)
  var ttl turtle.TurtleGraphics
  ttl.InitTurtleGraphics(128, 128, 10.0, img.Line)
  ttl.Color(255, 0, 128)
  rotBox(&ttl, 1.0, 8.0, 5.0)
  img.WritePPM()
}
実行結果
上記のメイン関数(turtleTST3.go)は、以下のようなパスにおき、かつ、そこのgo.modファイル内に ppm と turtle モジュールを発見できるように記載をしてあります。
go/proj/ttl
以下のようにして実行
$ go run turtleTST3.go > turtleSample.ppm
$ convert turtleSample.ppm turtleSample.png
なお ppm形式からpng形式への変換使っております convertコマンドは、ImageMagickの要インストールであります。
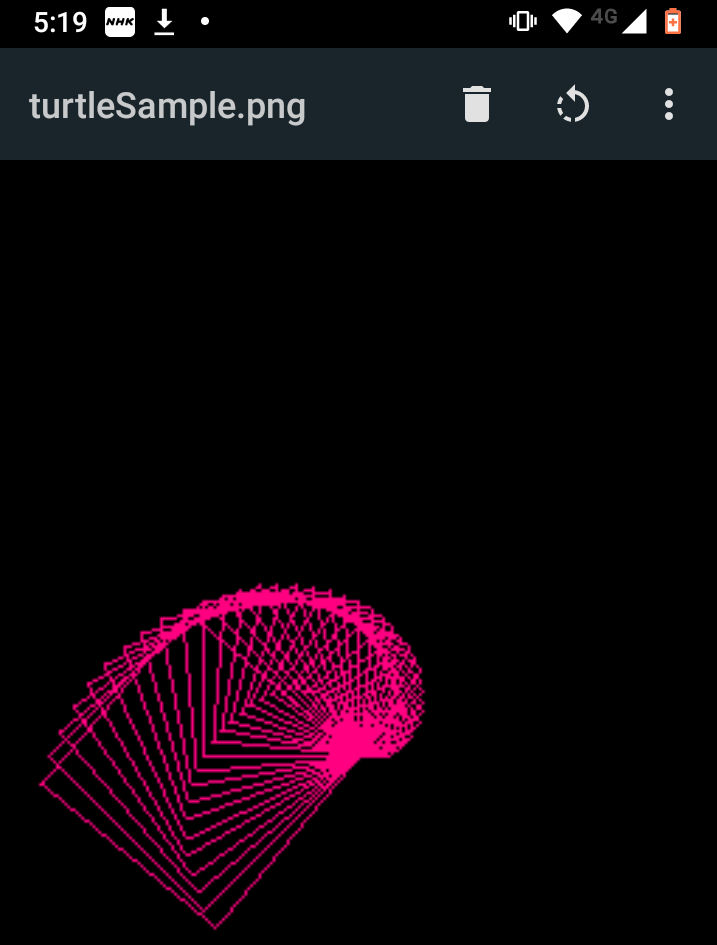
描いた「タートルグラフィクス」を表のAndroidアプリで眺めたところが以下に。
懐かしのタートルグラフィクス。遥かな昔、40年近く前ですな、Sony(Z80)やAtari(68K)のマシンの上で、今は亡きデジタル・リサーチ社製のDR. LOGOというLOGO処理系で遊びましたです。こんどLOGOも久しぶりにやってみますかねえ。First、ButFirst(LispのCAR、CDRみたいなもの)
やっつけな日常(10) スマホでGo! Line描画機能をppmパッケージに追加 へ進む
やっつけな日常(12) スマホでGo!1.26186…次元から染み出すコッホ曲線 へ進む
BUG FIX版: grad2d.go
package ppm

import (
  "fmt"
  "os"
)

func (this *PpmImage) Box(x1 int, y1 int, x2 int, y2 int, r int, g int, b int) bool {
  if x1 > x2 {
    x1, x2 = x2, x1
  }
  if y1 > y2 {
    y1, y2 = y2, y1
  }
  for x := x1; x<=x2; x++ {
    this.DotXY(x, y1, r, g, b)
    this.DotXY(x, y2, r, g, b)
  }
  for y := y1; y<=y2; y++ {
    this.DotXY(x1, y, r, g, b)
    this.DotXY(x2, y, r, g, b)
  }
  return true
}

func (this *PpmImage) Line(x1 int, y1 int, x2 int, y2 int, r int, g int, b int) bool {
  var dx int
  var dy int
  var x, y int
  var revx bool = false
  var revy bool = false
  if x1 > x2 {
    dx = x1 - x2
    revx = true
  } else {
    dx = x2 - x1
  }
  if y1 > y2 {
    dy = y1 - y2
    revy = true
  } else {
    dy = y2 - y1
  }
  if dx > dy {
    fmt.Fprintln(os.Stderr, "X mode ", x1, y2, dx, dy)
    if revx {
      fmt.Fprintln(os.Stderr, "REVX")
      x1, x2 = x2, x1
      y1, y2 = y2, y1
    }
    dy = y2 - y1
    for x= 0; x<=dx; x++ {
      if dx != 0 {
        y= (dy * x) / dx
      } else {
        y= 0
      }
      this.DotXY(x+x1, y+y1, r, g, b)
    }
  } else {
    fmt.Fprintln(os.Stderr, "Y mode", x1, y2, dx, dy)
    if revy {
      fmt.Fprintln(os.Stderr, "REVY")
      x1, x2 = x2, x1
      y1, y2 = y2, y1
    }
    dx = x2 - x1
    for y= 0; y<=dy; y++ {
      if dy != 0 {
        x= (dx * y) / dy
      } else {
        x= 0
      }
      this.DotXY(x+x1, y+y1, r, g, b)
    }
  }
  return true
}


